Importing images into the Dragon
This tutorial shows how to convert an image on your PC to a .CAS file that you can load in your emulator, or convert it to a .WAV file so you can load it in your real Dragon machine.
Contents
Step 1 : Preparing your image
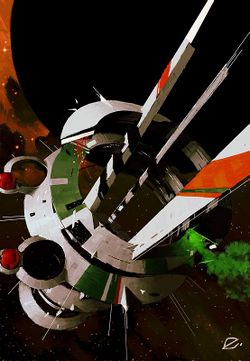
First, choose the image you'd like to convert. I've chosen this one:
Which is a wonderful art by ELLioT (http://www.elliotek.net).
First, we rotate the image 90 degrees to the left to fit the screen better.
Then, we crop the image from 800x554 to 738x554 to keep the 4:3 aspect ratio of the TV or monitor screen.
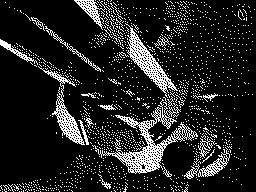
If you'd like to have your image in PMODE4 (256x192 2 colors), you have to scale the image to 256x192, convert it to grayscale image and then to black and white bitmap (choose the dithering method you like most). You should get an image like this:
Please remember to convert it back to grayscale image (with an 1:1 ratio) before saving, as Photoshop doesn't allow to save 1 bit raw images and the Raw2PMODE4 tool is designed to deal with each pixel as a byte.
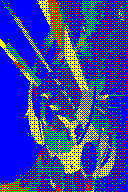
On the other hand, if you'd like your image in PMODE3 (128x192 4 colors), you have to scale the image to 128x192 and convert it to indexed color with one of the two palettes for this mode. You'll find the palette information in the downloads section below. With this procedure, you should get an image like this:
Now, you only have to save your image as .RAW file with no header. If everything's gone ok, your PMODE4 image should be 49152 bytes in size, or 24576 bytes if the image was processed as PMODE3.
Step 2 : Packing the data in Dragon format
The Dragon computer packs 8 pixels per byte in PMODE4 and 4 pixels per byte in PMODE3. So, the .RAW files must be packed according to the PMODE in which you'd like to display them.
This is done by using the tools Raw2PMODE3 or Raw2PMODE4, which can be downloaded below.
Their usage is quite easy. To convert a PMODE4 raw image, type "Raw2PMODE4 image.raw", and to convert a PMODE3 raw image, type "Raw2PMODE3 image.raw". This will create a packed file in the correct format with extension .PM4 or .PM3 (depending on the tool used).
Step 3 : Converting the image to .CAS or .WAV file
This step is super easy too.
You only need to use the DrBinCas tool (see the downloads section below) to generate the final file you need to see your image.
Just type "DrBinCas image.PM3 name 1536 1536" or "DrBinCas image.PM4 name 1536 1536".
For example, if we want the image to have the name "SPACE" in the .CAS file, you should type "DrBinCas image.PM4 SPACE 1536 1536".
To convert the .CAS file to a .WAV file, use the DC.EXE utility. Download link below.
Step 4 : Displaying Image
Now that you have your .CAS or .WAV file, you can load it in your favorite emulator or your Dragon with this simple program:
For PMODE4 images:
 10 PMODE 4,1:SCREEN 1,1
 20 PCLS
 30 CLOADM
 40 GOTO 40
For PMODE3 images:
 10 PMODE 3,1:SCREEN 1,0
 20 PCLS
 30 CLOADM
 40 GOTO 40
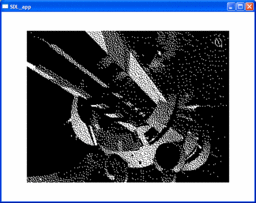
The converted images should look like this on the XRoar emulator:
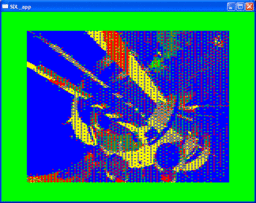
And that's it. I hope you'll find this tutorial helpful. You can find the palettes and utilities right below.
Downloads
- Utilities, palettes and source code: http://www.mediafire.com/?a32y1uvcd3ep228
- PMODE3 Palettes (RGB Values):
                   0 - Blue (0,0,255 or 0x0000FF)
                   1 - Green (0,255,0 or 0x00FF00)
                   2 - Yellow (255,255,0 or 0xFFFF00)
                   3 - Red (255,0,0 or 0xFF0000)
or
                   0 - Magenta (255,0,255 or 0xFF00FF)
                   1 - Cyan (0,255,255 or 0x00FFFF)
                   2 - Orange (255,166,0 or 0xFFA600)
                   3 - White (255,255,255 or 0xFFFFFF)
